
If you're experiencing issues with your vehicle's electrical functions, don't worry! It's possible that a faulty relay is to blame. Luckily, replacing a relay is a simple task that you can tackle on your own. You don't need to be a car expert to get the job done. With a few basic tools, some patience, and your owner's manual, you'll have your vehicle running smoothly again in no time.
#1 Identify the Problem Relay
Before you dive into the replacement process, it's crucial to identify the specific relay causing the issue. Consult your vehicle's owner's manual or the diagram on the relay box cover (or a trustworthy online source) to locate the relay associated with the malfunctioning component. For instance, if your windshield wipers aren't working, find the wiper relay.
#2 Gather Your Tools
To successfully change a relay, you'll need a few basic tools: a set of screwdrivers, pliers, and the replacement relay. It's always a good idea to have the right replacement part on hand before you begin.
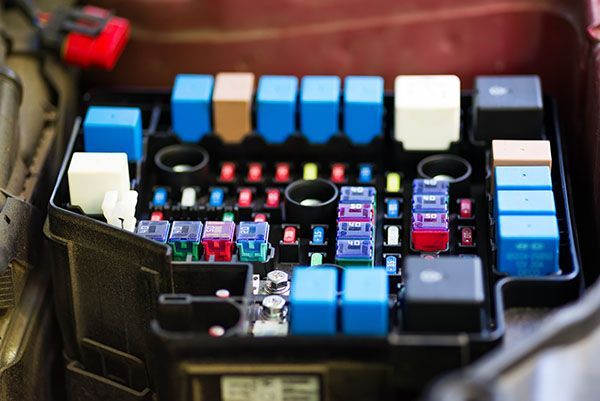
#3 Locate the Relay Box
Most modern vehicles have a central relay box that houses various relays for different systems. The relay box is often found in the engine compartment, near the fender wells, or under the dashboard. Once you've located it, use the diagram on the cover or in the owner's manual to pinpoint the relay you're replacing.
#4 Disconnect the Battery
Before working on any electrical component, it's crucial to disconnect the negative terminal of your car's battery. This ensures your safety and prevents accidental short circuits.
#5 Remove the Old Relay
Using a screwdriver or pliers, gently remove the old relay by carefully pulling it out of its socket. Be cautious not to damage the surrounding wires or connectors.
#6 Insert the New Relay
Take your new relay and align it with the socket. Firmly press it into place until you hear a satisfying click, indicating that it's properly seated.
#7 Reconnect the Battery
With the new relay securely in place, reconnect the negative terminal of the battery. This step is crucial to re-energize the electrical system.
#8 Test the Replacement
Turn on the vehicle and test the component associated with the relay you've just replaced. For example, if it was the fuel pump relay, start the car and check if the fuel pump engages as it should.
#9 Double-Check Connections
Once you've confirmed that the issue is resolved, take a moment to ensure all connections are secure and that no wires are pinched or obstructed. This precaution helps prevent future problems.
#10 Close the Relay Box
If the relay box had a cover, carefully place it back in its original position and secure it with any clips or screws provided.
The team at Lighthouse Automotive won't blame you if this task is a little bit complex for you. The simple answer to your hassles is to contact us so we can figure out a plan of action together! In general, the best plan of action is to visit the shop so we can take care of your issue and get you back on the road ASAP.


.jpeg)


